How to Setup Dokan Plugin? An In-depth Guide 2024!
Do you wonder how websites like Amazon and eBay are built? Or what does it take to create a marketplace similar to those? I will explain how to create a multi-vendor marketplace using the Dokan plugin in this article.
Dokan is a free and premium WordPress plugin that helps you set up an online marketplace. The online site can have many sellers and tons of products for buyers. Entrepreneurs with smaller budgets prefer the plugin when starting their ventures online.
In terms of features and affordability, Dokan beats many competitors. It has helped create over 60,000 marketplaces to date at 60% cheaper. Additionally, Dokan has a 90% customer satisfaction rate with 24/7 active support.
In short, Dokan has everything you would need to start your very own online marketplace.
Read this in-depth guide on how to set up the Dokan plugin on your WordPress website.
Dokan for WordPress: An Introduction
The Dokan plugin for WordPress is based on WooCommerce. It helps you set up a marketplace within minutes. You can customize vendor requirements and registration forms on your marketplace.
The plugin supports several payment methods including Stripe, PayPal, and debit/credit cards. Dokan also offers a multilingual support option so you can assist a worldwide customer base. It has a simple interface designed to be easy to use for non-tech people.
Some popular examples of marketplaces include service-based markets or digital marketplaces. You can also use Dokan to create traditional marketplaces where vendors can sell physical products.
To summarize, the Dokan WordPress plugin is the simplest and easiest method of creating a multi-vendor online marketplace in 2024.
Now let’s get to the Dokan setup guide!
Requirements for Dokan Installation
First, you need to have a few things figured out before can install the Dokan plugin. A must-have is a functional website powered by WordPress. Another requirement is the installation of the WooCommerce plugin.
Additionally, you can purchase Dokan’s premium version beforehand. But that is an optional step. Here is a summary of the requirements for the setup of the plugin:
- A functional WordPress website
- WooCommerce plugin installed & activated
- Optional: Dokan Pro plugin files
Here are the steps you need to follow to install Dokan and then use it to create an online marketplace.
Step 1: Install the Dokan Plugin on WordPress
You can choose from two options when installing the Dokan plugin. A) install the free version and upgrade later, or B) buy Dokan Pro and install it. There is only a minor difference in the installation of the free and pro versions. Dokan Pro requires manual upload to WordPress, whereas the free version can be installed directly from WordPress.
Let’s begin installing the plugin.
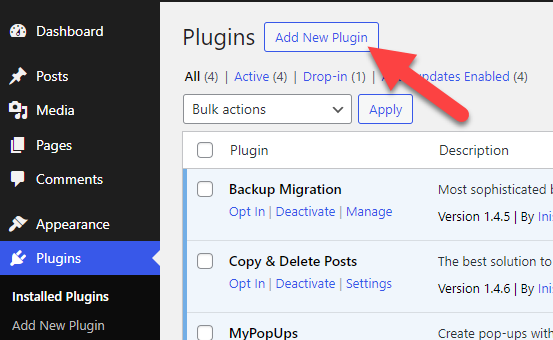
First, go to your WordPress dashboard. There, click on the “Plugins” tab in the menu.
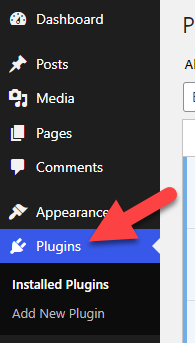
Now click on the “Add New Plugin” button as highlighted in the screenshot below.
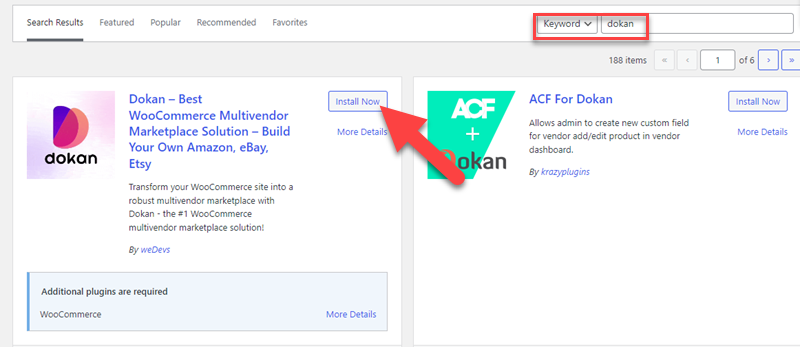
Search for “Dokan” in the search tab in the top-right corner. Click on “Install Now” as the plugin shows up on top. The following screenshot explains these steps further.
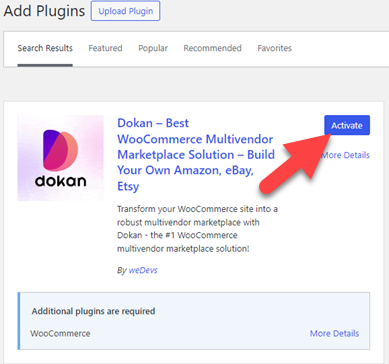
Click the blue “Activate” button next as the screenshot shows.
You will see a welcome screen of the Dokan setup wizard after the plugin is activated. That confirms you have installed and activated the plugin successfully.
Good work! Now let’s start setting up your multi-vendor marketplace…
Step 2: Initial Store Setup
Dokan, pro or free, will ask you to complete the wizard setup after activating the plugin. This includes basic settings configurations like store URL customization. It also includes shipping details and other settings.
Enter a Custom URL you like best in the first field. Now you can customize the recipient of the shipping fee. The options include marketplace admin and store vendor.
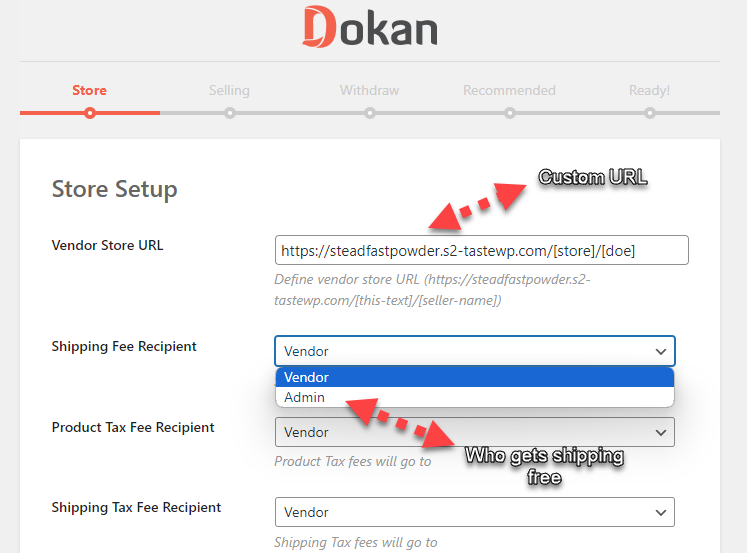
After that, you can provide the API key to show the store location on Google Maps.
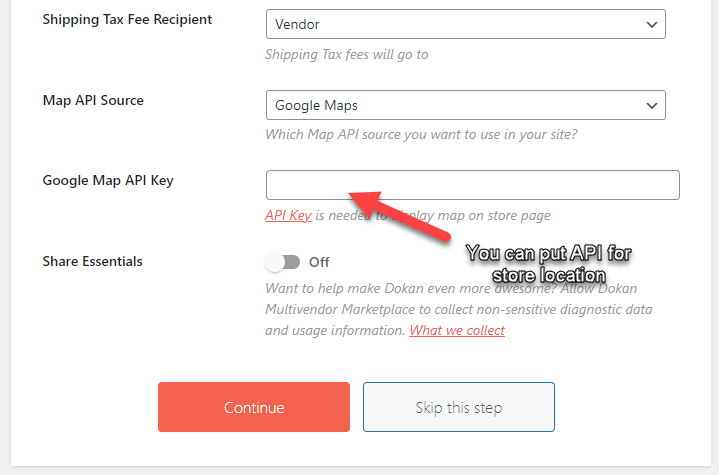
Once you complete the store settings, move to the next page of the wizard.
Step 3: Customize Selling & Commissions
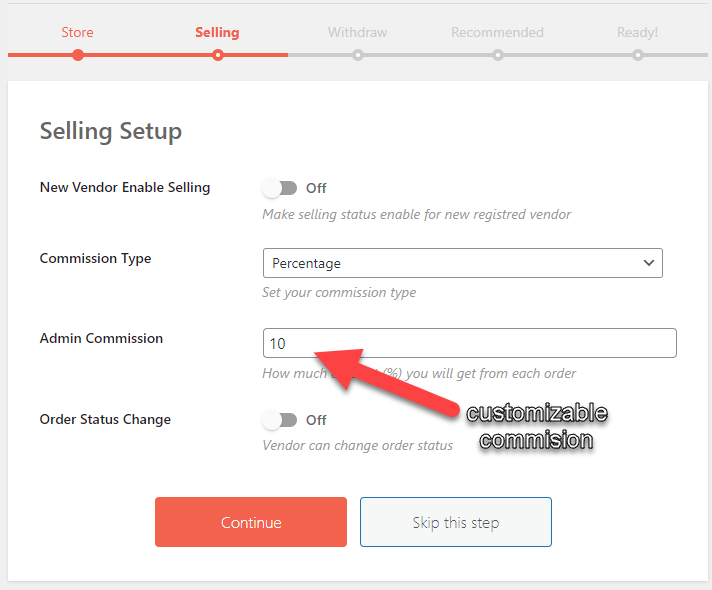
In the third step of your plugin setup, you have to customize the selling details. First, you can enable or disable the selling status for new vendors.
Then you can change the commission types between a percentage and a flat fee. And you will also be able to put a custom number in this step.
Take a look at the screenshot below where you will see the settings for vendor selling and commissions.
Step 4: Configure Withdrawal Settings
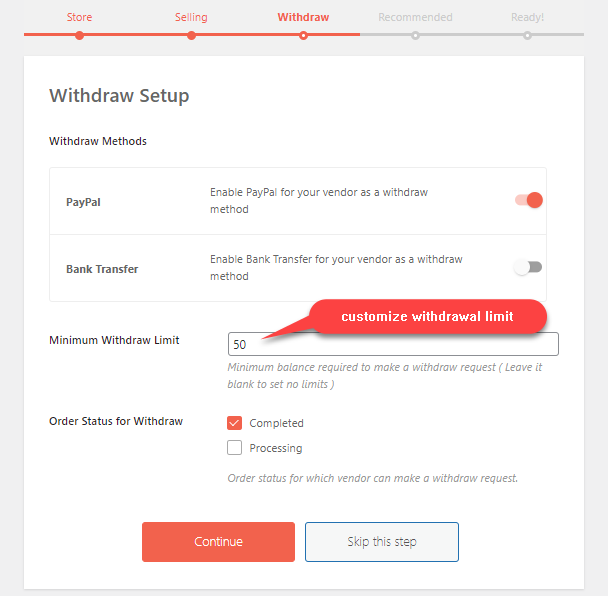
Next, Dokan asks you to configure the withdrawal settings. This requires you to select withdrawal methods. PayPal and bank accounts are the two options available. You can choose both or either one to begin with.
The same page allows you to set up a minimum withdrawal limit for vendors. Dokan also gives you the option to enable withdrawals before or after the completion of an order.
The following screenshot shows the withdrawal settings page in the setup wizard.
Step 5: Check Dokan’s Recommendations
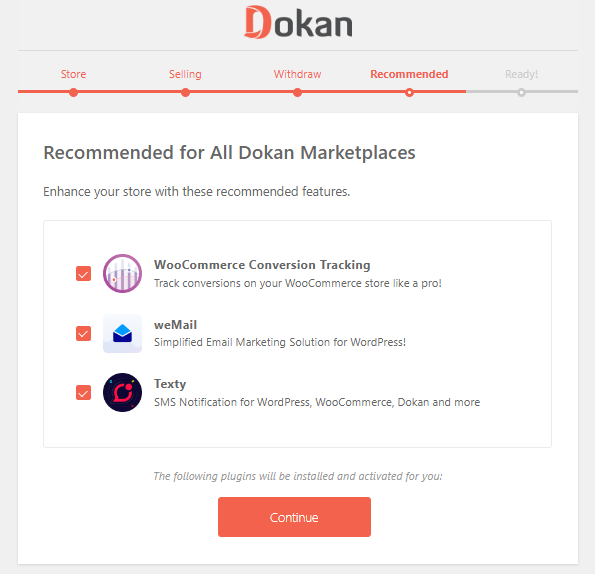
Dokan will give you some recommendations on the next page. These are plugins that add extra functionality to your marketplace. For example, the Text plugin sends SMS notifications to customers. Skip or complete the recommendations as you like.
Now you are all set up to visit your marketplace. Click “Visit Dokan Dashboard” to access the control hub for your marketplace!
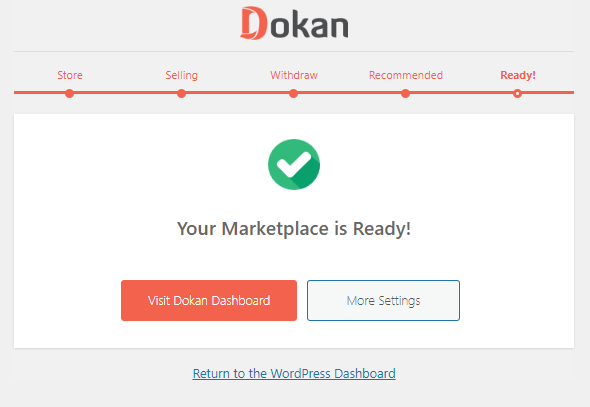
The initial setup is now complete. Keep reading to learn more about Dokan.
Step 6: Explore the Dashboard
Now that you have completed the initial setup, it’s time to explore the admin dashboard for your marketplace. At first glance, you will see the following page as the dashboard home.
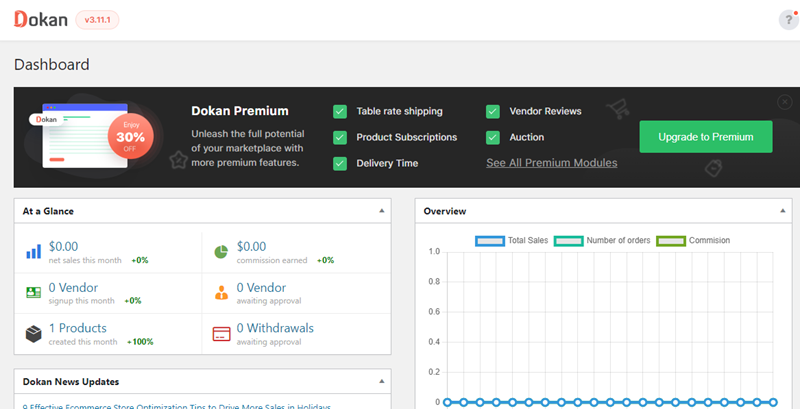
This includes important information including sales, commissions earned, and vendors. The immediate info tab also tells you how many products are available.
The dashboard’s menu has many options to manage vendors, withdrawals, and many other marketplace settings. You can manage these settings as you see best.
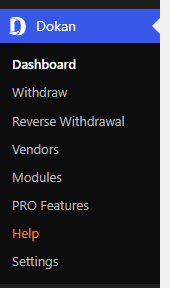
For now, you can launch your marketplace and start enabling vendors to sell products in the marketplace!
What’s Next?
You have completed the setup and got familiar with the plugin. The next step is to market your marketplace and bring in as many vendors as you can. Or you could sign up to be the first vendor yourself.
Additionally, your job is to manage the vendor sign-ups and create custom registration forms. Product quality, shipping details, and withdrawals are more things that you have to overlook. In summary, you will have to manage the marketplace like you would manage a physical store.
And if deemed necessary, you could upgrade your Dokan plugin to the Pro version for even more features.
Bonus: How to Upgrade to Dokan Pro?
Dokan’s free version is a great to kick off a multivendor marketplace online. However, you get tons of extra features with the premium version. If you have started your marketplace with the free version, continue reading to learn how to upgrade to Dokan Pro.
Click the “Upgrade to Premium” button on the admin dashboard.

You will land on the pricing page on Dokan’s website. Select a plan that suits your requirements and click “Buy Now“.
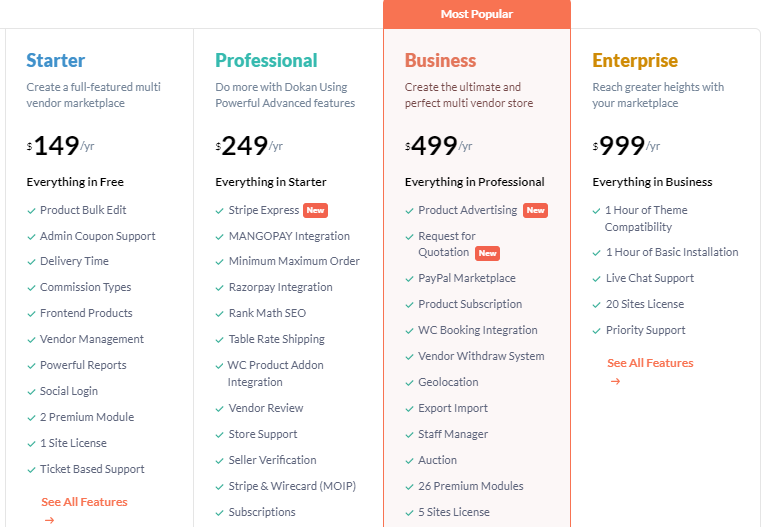
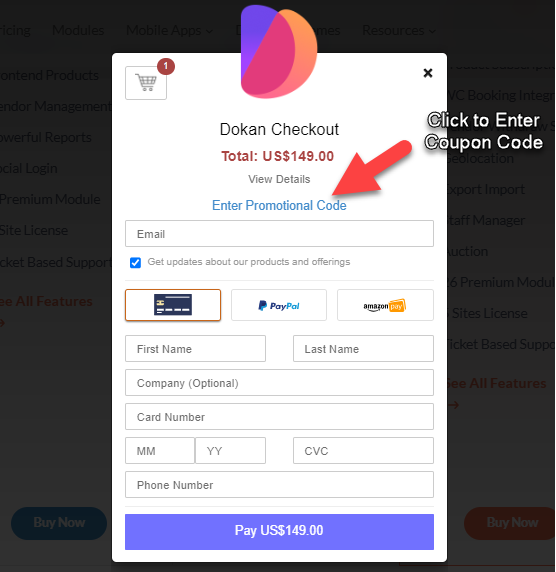
After that, fill out the purchase pop-up on your screen. It requires your payment and personal details. You can also add a Dokan coupon code to get a discount on your purchase.
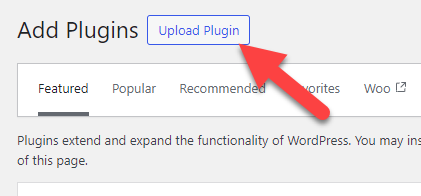
After completing the payment, you will download the premium Dokan plugin. Go to the Plugins menu on your WordPress dashboard and click “Add New Plugin“. Then click on “Upload Plugin” and add the .zip files to your WordPress site.
The rest of the setup is exactly similar to the free version, with some additional features. Completing these steps will enable you to enjoy the premium Dokan experience!
Wrap Up
Dokan is one of the most popular plugins that has helped tens of thousands of entrepreneurs create their online marketplaces. The WordPress plugin comes with all the features and tools necessary to create and manage a multivendor marketplace.
Setting up a marketplace with Dokan takes a few minutes only. Its admin dashboard allows marketplace owners to manage vendors and some custom settings. The plugin also has a comprehensive dashboard for vendors.
In this article, I discussed a simple overview of the plugin and what it can do for you. You can read the step-by-step guide above on how to set up a Dokan plugin in 2024.
If you have any further questions, please comment below and I will try my best to answer all of them!
